
Tip #1 - Set up a live chat
Even if you have tons of information on your website, sometimes it may not be enough. In this day and age, visitors are looking for answers instantly, and the thought of searching through multiple pages may turn them away.
It may be challenging to cut down on the number of pages you have on your site, but there’s another way to ensure that information is delivered to your visitors quickly — through a live chat. It need not be maintained by support staff; chatbots are just as capable. With a live chat, visitors can ask questions and get their answers immediately, and make it easier for you to suggest specific pages that they should visit (and of course, increase your conversion!).
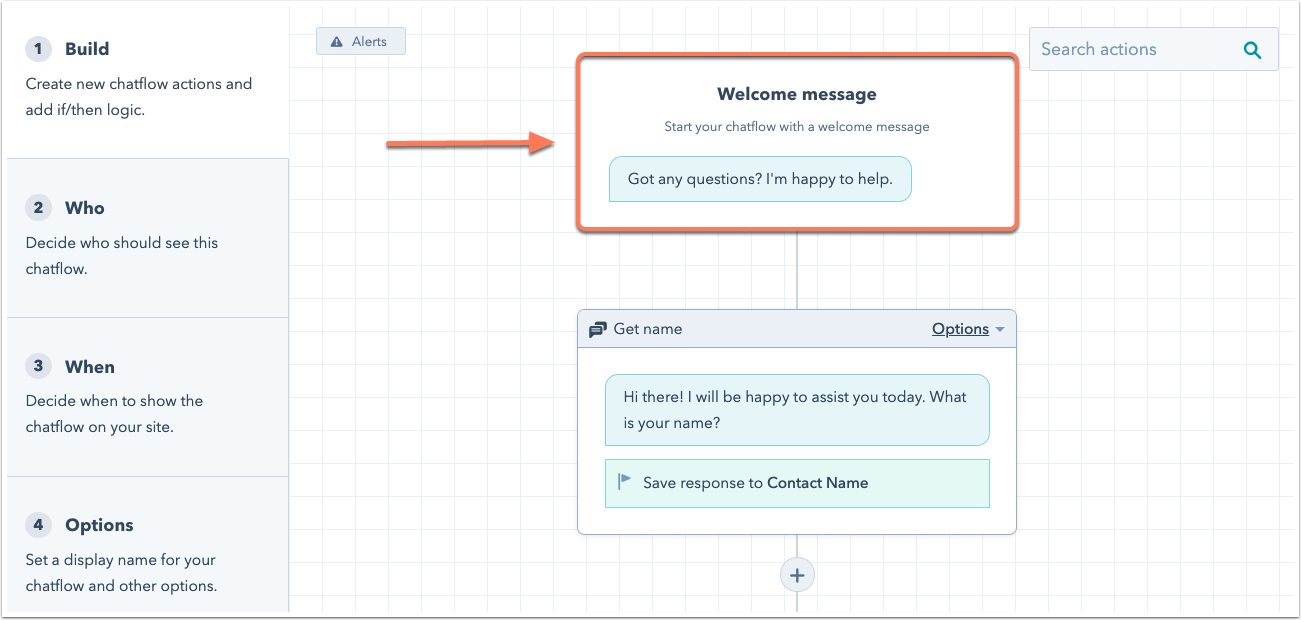
Image from HubSpot
Tip #2 - Identify your site visitors
With HubSpot, identifying sales-ready prospects that have visited your site becomes an almost effortless task. The Prospects tool allows you to track which companies are viewing your website, even if no form has been filled. The tool identifies companies based on their IP addresses and automatically inputs this data into your CRM. The information includes details such as company name, location, number of visits, page views and more, which allows for a good gauge of their level of interest. It can be useful for you to determine an appropriate engagement strategy accordingly. Moreover, it also helps you to track if your company is doing enough to meet your goals.
Tip #3 - Setting a default blog
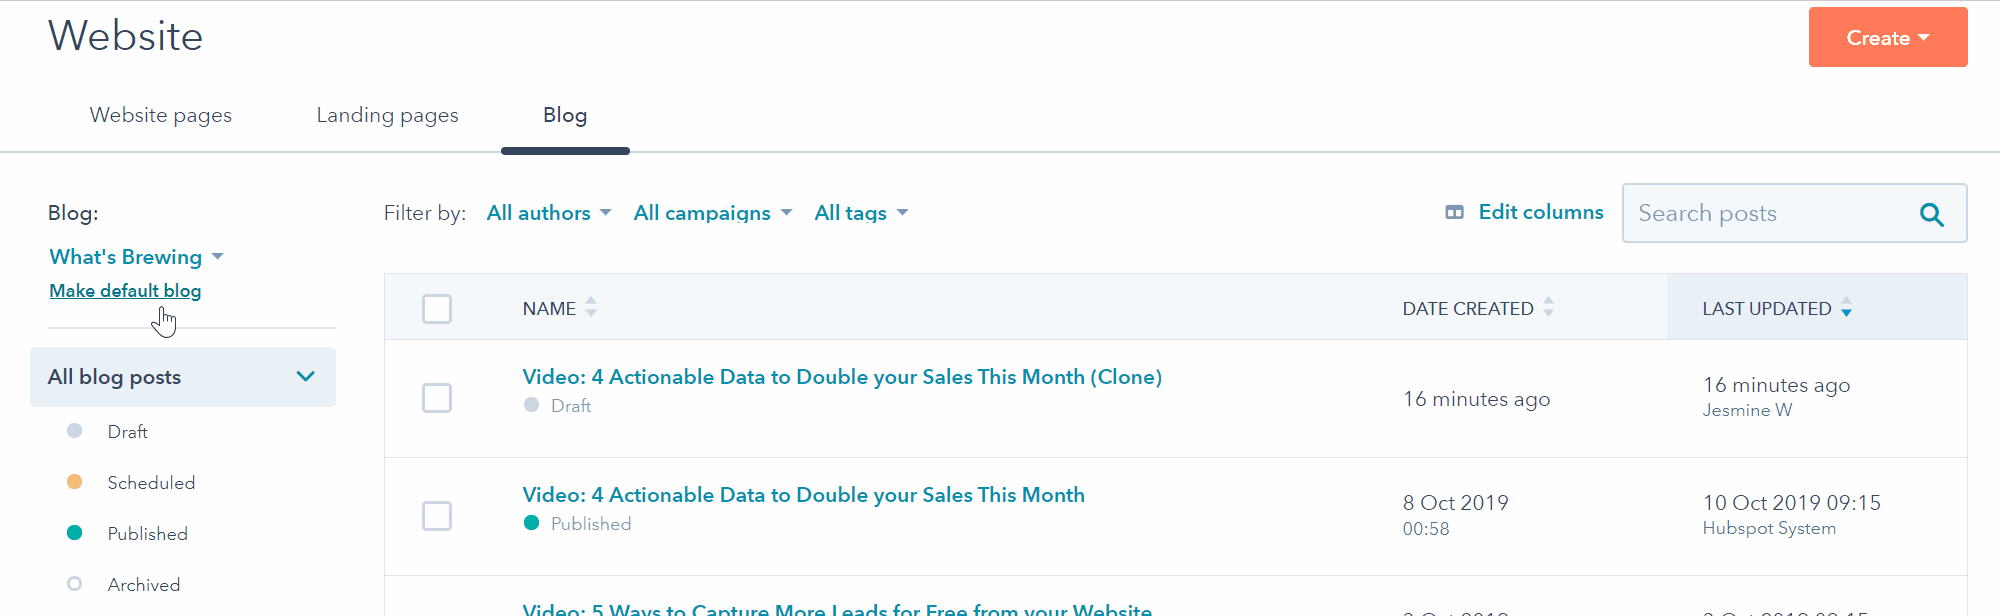
Users with multiple blogs that deliver different content might have experienced the nightmare of accidentally publishing a post in the wrong blog and having to go through the cumbersome process of re-posting it on the right one. With HubSpot, you can easily ‘star’ the more frequently used blog and make it your default option so you can avoid having to switch between blogs constantly. This also reduces the chances of getting mixed-up, especially after you grow used to the default order.
Tip #4 - Tracking blog views
HubSpot offers a great variety of tracking functions, but they can only be fully utilized when users understand the data displayed. If you track your blog views, you might have noticed that the data shown on your dashboard is incongruent with the views presented in the Analytics tab of the Blog tool.
For instance, on the Marketing Dashboard, the Blogging Performance displayed is 5,000 blog views. However, when you engage the Blog tool, the numbers have spiked to 15,000 blog views.
This is neither a glitch nor inaccurate information captured by the system-- these two numbers are pulling different information. The Blog tool accounts for all blog views in the selected time range, for any article ever published. On the other hand, the Blogging Performance report on the dashboard includes only the views associated with blogs published during a selected time frame.
In essence, HubSpot can capture both your overall popularity and the popularity within a selected period for a more well-rounded review.
Tip #5 - Create topics to improve your SEO
In the past, SEO used to be about specific keywords, but times have changed. The content you create today needs to be more effective, and incorporate keywords as well as topics to help you keep up with the algorithms behind search engines.
Here is where HubSpot’s SEO tool comes in, to help you brainstorm about content to write about, group them into topics, and analyze their effectiveness. To start creating topics, click on Marketing > Planning and Strategy > SEO, then select ‘Add a topic’.
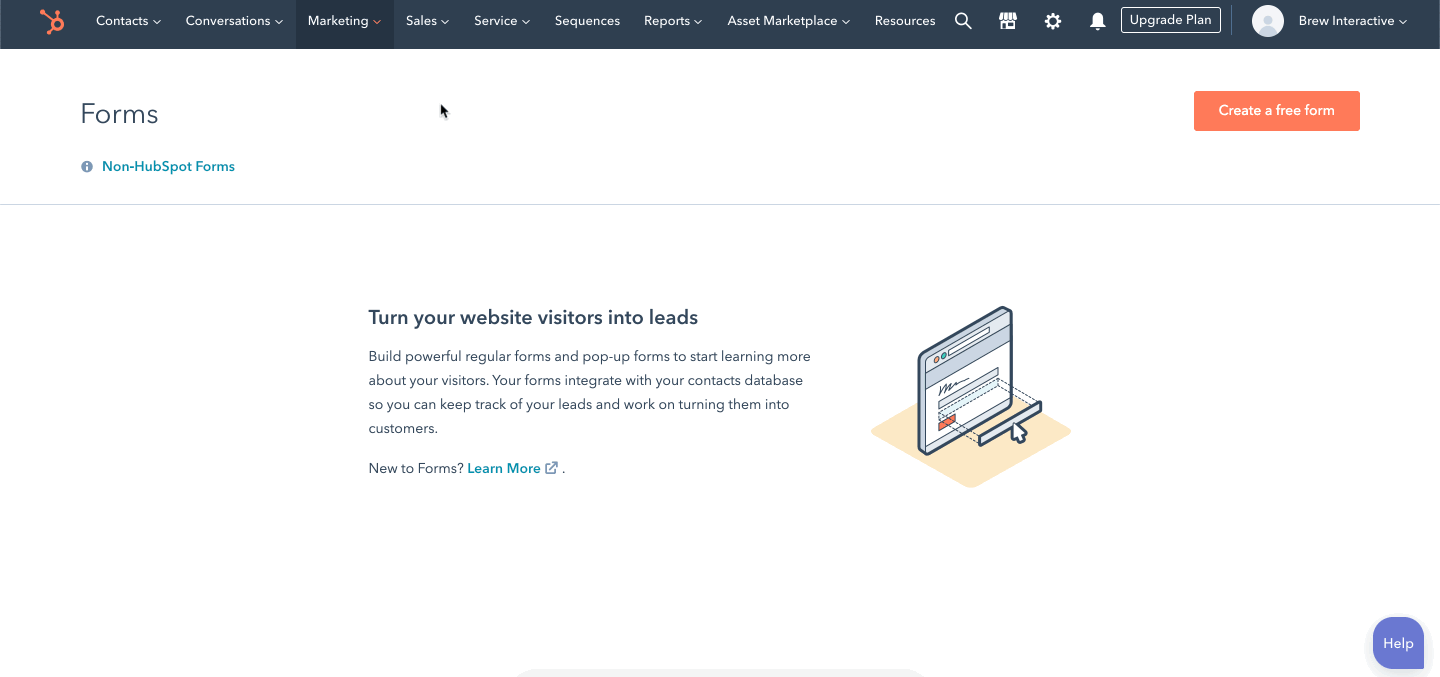
Tip #6 - Convert your site visitors though pop-ups
HubSpot’s lead conversion forms are a great way to reach out to your site visitors and convert them. Instead of creating multiple landing pages, you can place pop-ups, drop down banners, and slide-in boxes on specific pages that will appear to visitors, and customize them to maximize engagement. To do so, click on Marketing > Lead Capture > Forms.
Tip #7 - Keep your landing pages simple
Chances are, you’ll develop landing pages as part of your marketing strategy to engage visitors and convert them into leads. HubSpot allows you to create and publish landing pages without spending hours of effort, either from scratch or their library of templates. To create a landing page, click on Marketing > Website > Landing Pages, then select ‘Create’.

From there, you can customize the content, call-to-action (CTA), forms, and design of the landing page. You can also personalize the content that will appear to individual visitors based on details such as their location and lifecycle stage. However, remember to keep your landing page as simple as possible. The main goal is to attract the visitor/reader to your offer, and cluttering the page with too many links or offers may end up confusing them. One way to do so is to remove the navigation so that they will stay on the landing page, and place a maximum of two CTAs to convert them into leads.
Tip #8 - Scheduling Tweets

Apart from scheduling email updates, HubSpot’s social publishing tools also allows you to schedule updates on social media platforms like Facebook, LinkedIn, and Twitter. Most companies have taken to establishing themselves on social media platforms for greater outreach. If your company sends out multiple updates a day, it’d be too time-consuming to schedule each one individually. HubSpot has a social publishing tool which makes it easy for you to manage your social media platforms.
Go to Social > Social Publishing and click on the upload cloud in the top-right corner. If you want to schedule updates on Twitter, you can draft your Tweets in an Excel document following this outline, and upload the file. You can schedule an entire month’s worth of Twitter updates by specifying the date and time you’d like the Tweets to be published.
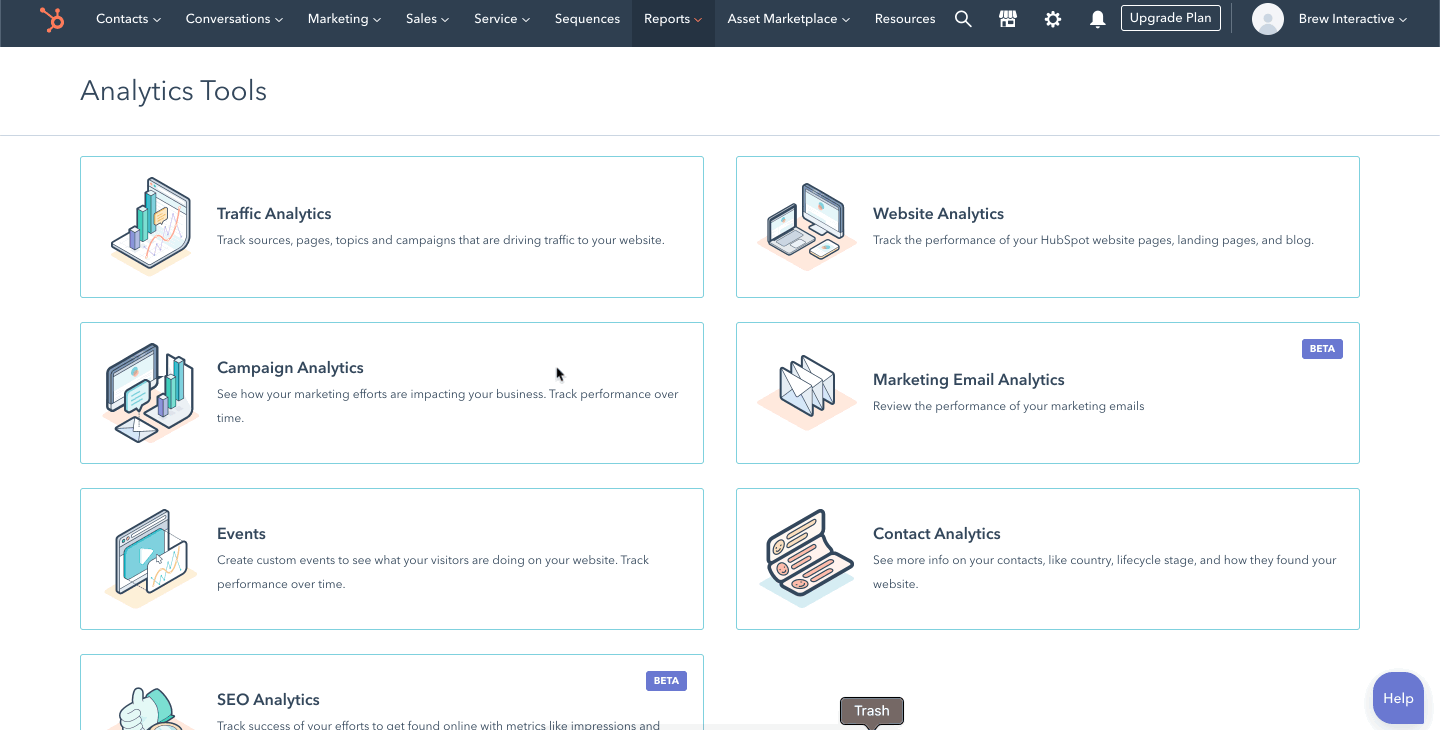
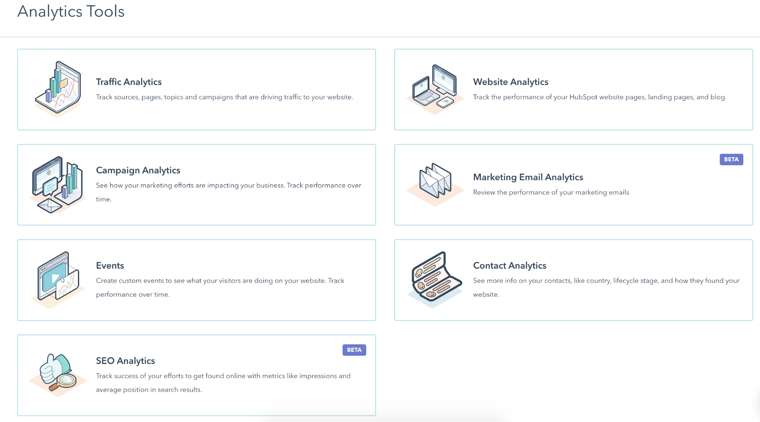
Tip #9 - Know how well your pages are doing
Some web pages work better than others, and it’s important to know which are performing, and which require more work. HubSpot has a range of analytics tools that provide details on your pages, such as traffic, the performance of marketing emails, and SEO metrics.
Tip #10 - Design smart forms
HubSpot’s forms allow customization so you can maximize its effectiveness. For example, you can set form fields to be a certain amount of characters, so visitors filling out forms will be more likely to use an actual number or name, instead of leaving it blank or inserting random characters. Alternatively, if your visitor has filled in a form previously, and you have the details, you can use progressive fields. This will hide the fields that they’ve filled in previously.
To create a smart form, select your landing page or website page and click on edit. Click on the form module, and click on the make smart icon to determine the criteria.
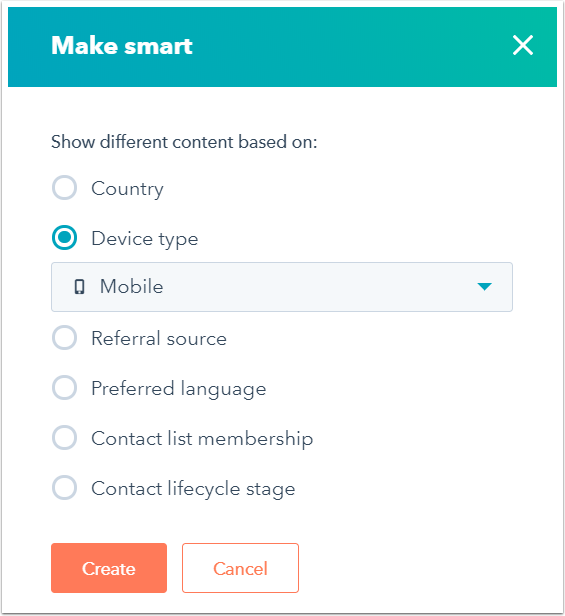
Image from HubSpot
Tip #11 - Enable your notifications
If you are someone who prefers to turn off all notifications to avoid spam, this will be right up your alley. HubSpot can be configured so you can choose to receive notifications for only the most important updates, such as when conversions and lead revisits happen. These updates can be delivered to your inbox or your HubSpot dashboard. You can also set up the ‘HubSpot bot’ to notify you of lead notification and form submissions in real-time so you’re always up to date.
Tip #12 - Use only one or two call-to-action(s) in your emails
A call-to-action (CTA) is essentially a button or link that guides your visitors/readers to your website, where they can be converted into leads. To create a CTA, click on Marketing > Lead Capture > CTAs, then select ‘Create CTA’.
CTAs should ideally be attractive and eye-catching, and HubSpot allows you to customize the style of the bottom. You can also create another version for A/B testing, or design a smart CTA.
However, remember not to flood your emails and site with multiple actions, as too many may end up turning away your visitors/readers instead. Instead, place one or two buttons that are tailored to your audience for maximum engagement.
Tip #13 - Set up a lead scoring system
Lead scoring is essentially assigning scores to your leads based on a set of criteria, such as the information they’ve provided and their engagement with your website. Based on the scores, you can figure out the leads that should be prioritized, contacted, and engaged, helping you boost your conversion rates by reaching out to contacts that are likely to be responsive. To begin, click on the settings icon, then select Properties. Search for ‘HubSpot score’, then click on ‘Add new set’.
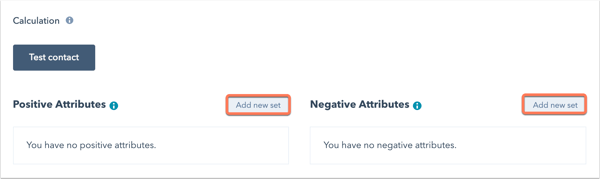
Image from HubSpot
There are two ways to do it. Firstly, you can assign scores on your own via manual lead scoring. Alternatively, try HubSpot’s predictive lead scoring, where scores will be assigned based on existing information.
Tip #14 - Utilize the Workflows tool

The Workflows tool, which is available on Professional and Enterprise accounts, can help you automate your internal and external tasks, so you can minimize the time you spend manually updating your information.
HubSpot allows you to scale your lead qualification processes to identify your most qualified leads better. You can activate a workflow to set off a series of actions when a contact exceeds a particular score.
The qualifications of your contacts can be determined through HubSpot properties such as:
- HubSpot score (Marketing Hub Professional and Enterprise only)
- Likelihood to close (Marketing Hub Enterprise and Sales Hub Enterprise only)
- Contact priority (Marketing Hub Enterprise and Sales Hub Enterprise only)
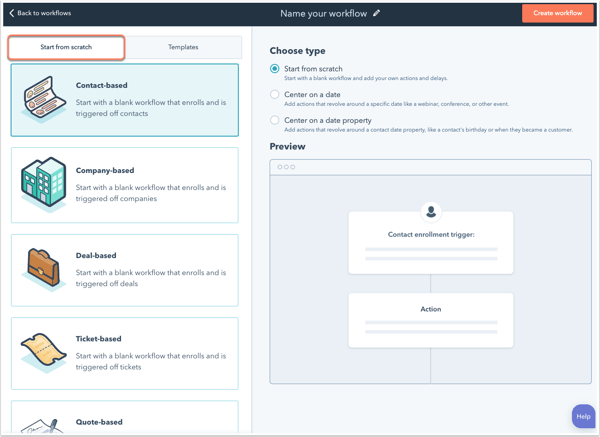
To do that, all you have to do is navigate to Automation > Workflows. In the upper right, click ‘Create Workflow’. Then, in the left panel, select ‘Contact-based workflow’, and in the right panel, select ‘Start from scratch’. Enter a name for the workflow, and select ‘Create Workflow’.
You can then play around with the functions such as choosing to set enrollment triggers so that only contacts with a specific HubSpot score will be enrolled. This can be done by clicking the plus icon to add an action to the workflow, selecting the ‘Choose an action’ panel and setting the contact property value. Select ‘Lifecycle stage’ and manually enter the new property value dropdown menu before selecting ‘Marketing Qualified Lead’ and saving. You can review your workflow settings in the ‘Settings’ tab before saving these changes and finally, selecting ‘Activate’.
Your automation can be further adjusted to suit the needs of your business and adding contextual content to help you with closing customers.
Tip #15 - Create smart content
If you’re targeting a wide range of consumers, one way to engage them personally is through smart content, which allows you to customize the content shown to contacts based on their country, device, or lifecycle stage. This can be used in several ways. You can either advertise different products or services depending on the country or promote different pages based on the lifecycle stage.
To create smart content, open your website or landing page, locate the rich text module, and select the ‘Make Smart’ icon.
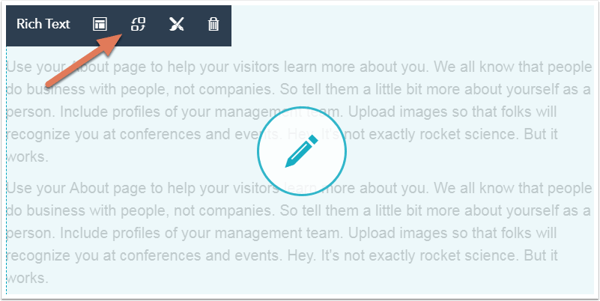
Image from HubSpot
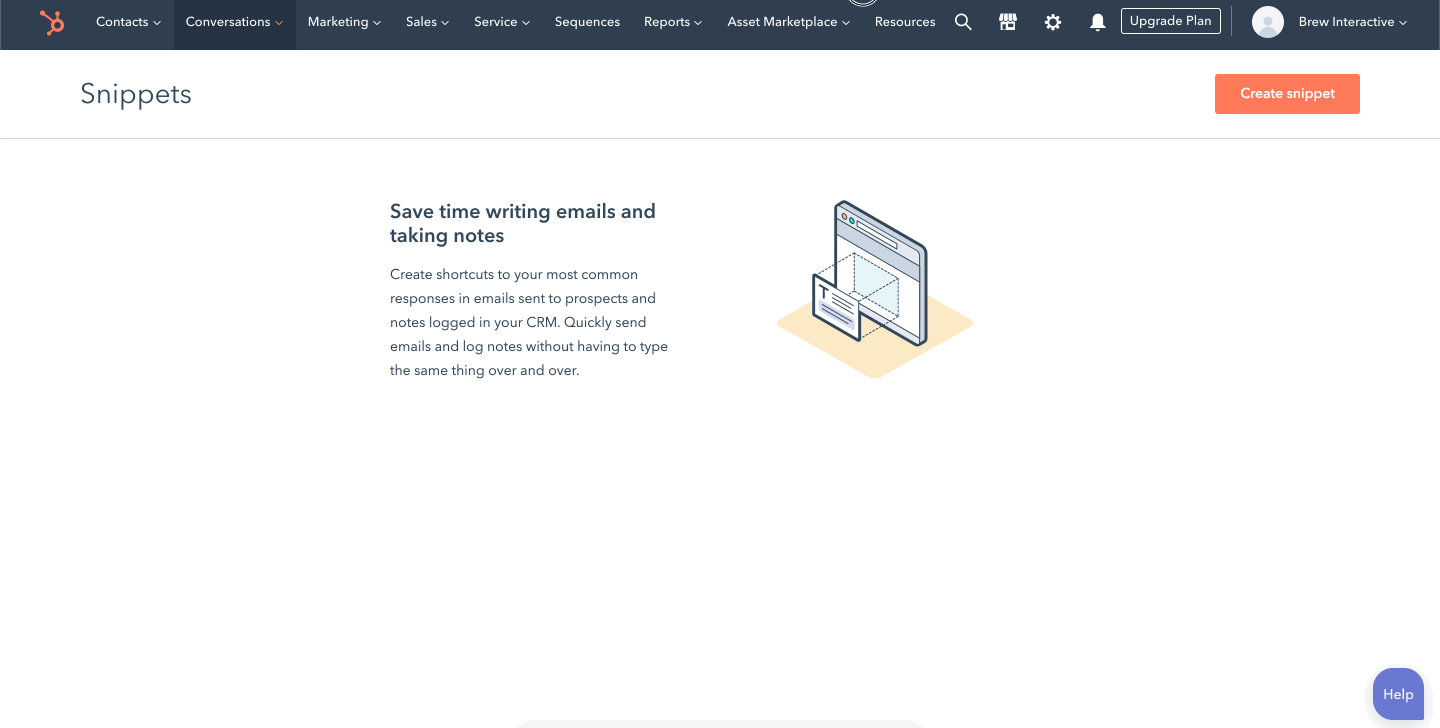
Tip #16 - Create snippets
If you find yourself repeating the same things over and over via chats or emails, try creating and using snippets, which are short text blocks that can be reused. These are different from email templates (which we’ll discuss later); HubSpot’s snippets tool allows you to create blocks of text, rather than one whole template.
To create a snippet, head to ‘Conversations’, then select ‘Snippets’. Click on ‘Create snippet’, then fill in the text, before saving it. To use them, you can either type the ‘#’ symbol or select the snippets icon and choose a snippet.
Tip #17 - HubSpot’s personalization tokens
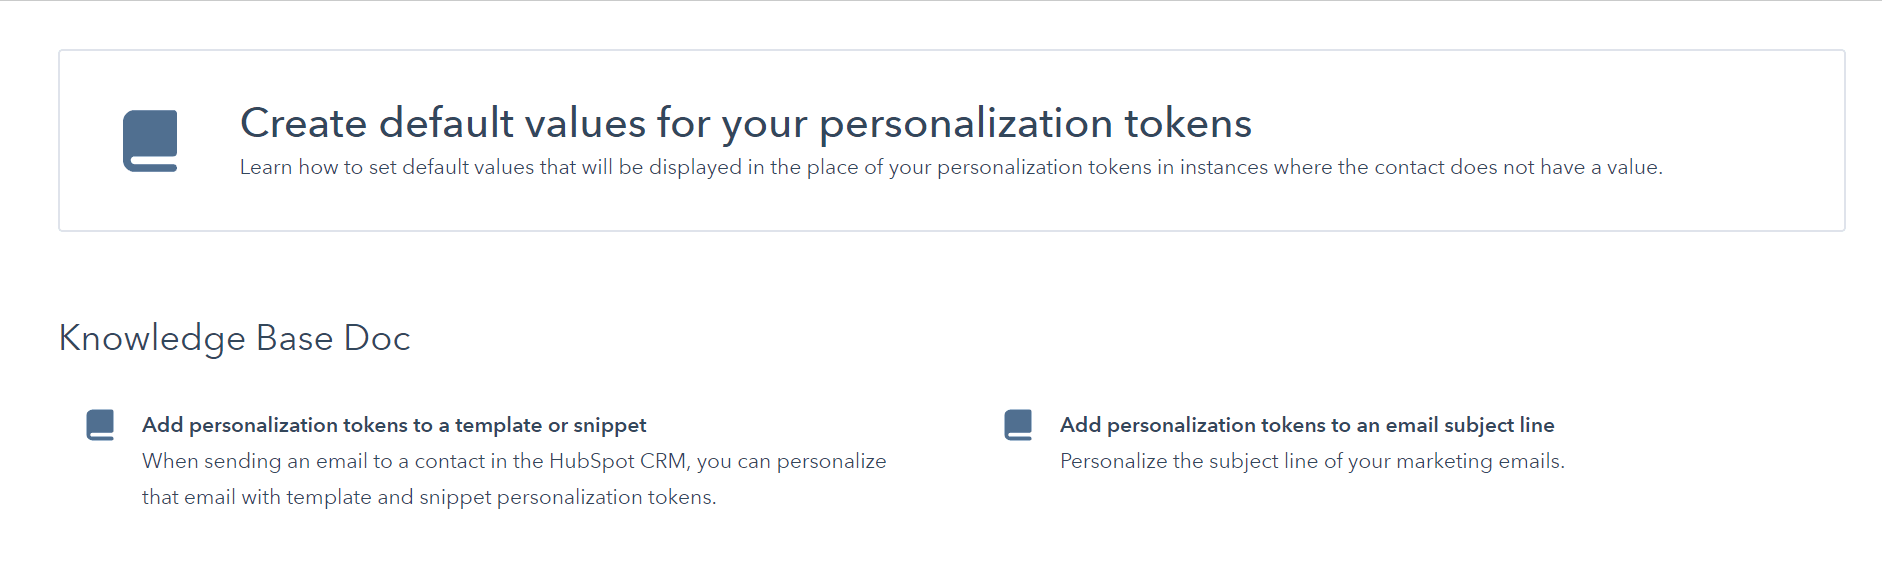
This hack is a perfect complement for scheduled emails. HubSpot’s personalization tokens allow you to add a personal touch to the emails that you send out so that they will look as though they were intended for one specific person. Personalization tokens are highly flexible and offer the customization of different properties such as first name, company name, office location, subscription type, and more. This function diminishes the need to manually key in salutations for each email or invest time into including the names of the recipients as everything can be automated.
Since there is nothing more eye-catching than emails that appear as if they are personally addressed to a specific individual, the use of personalization tokens is bound to help increase email engagement as recipients will be more compelled to open them.
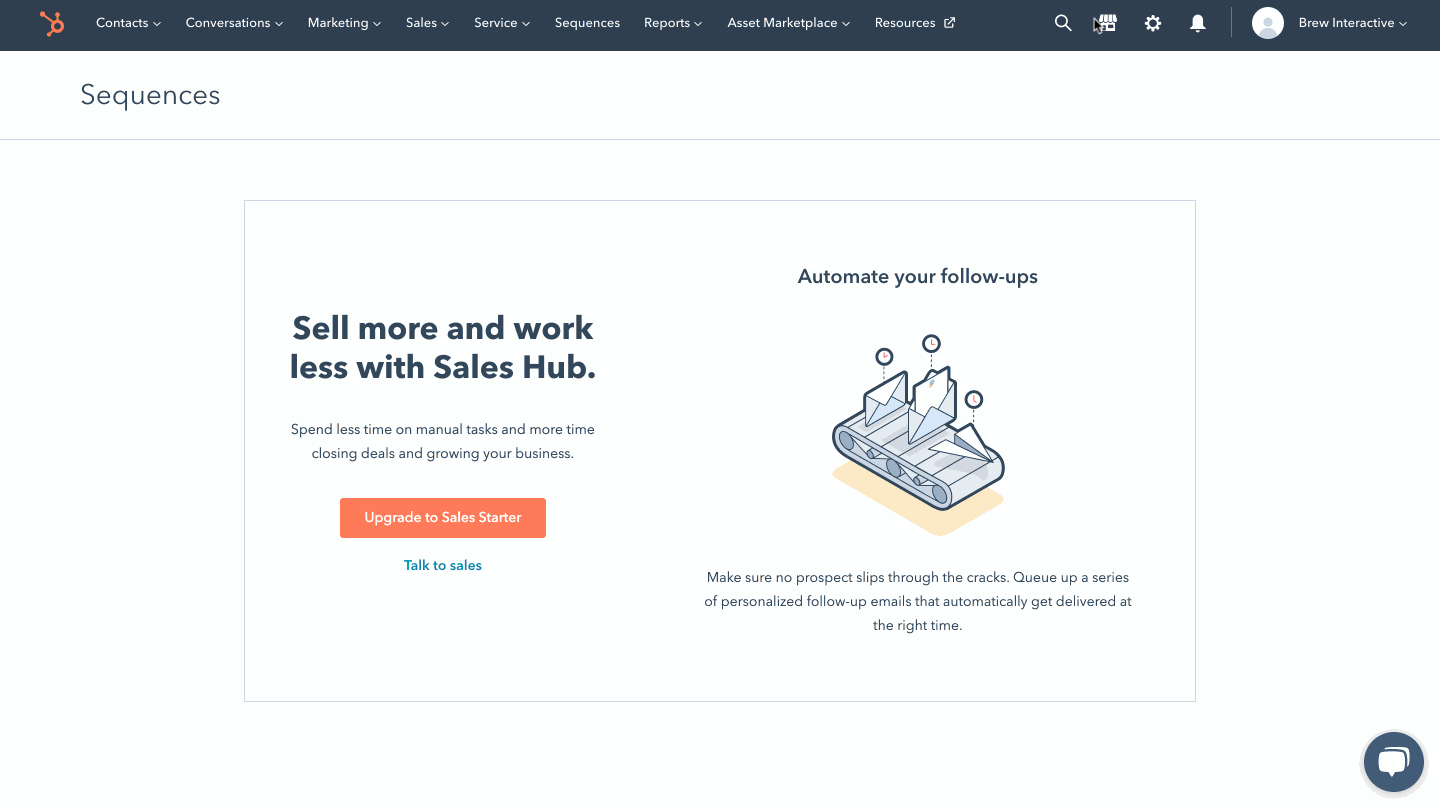
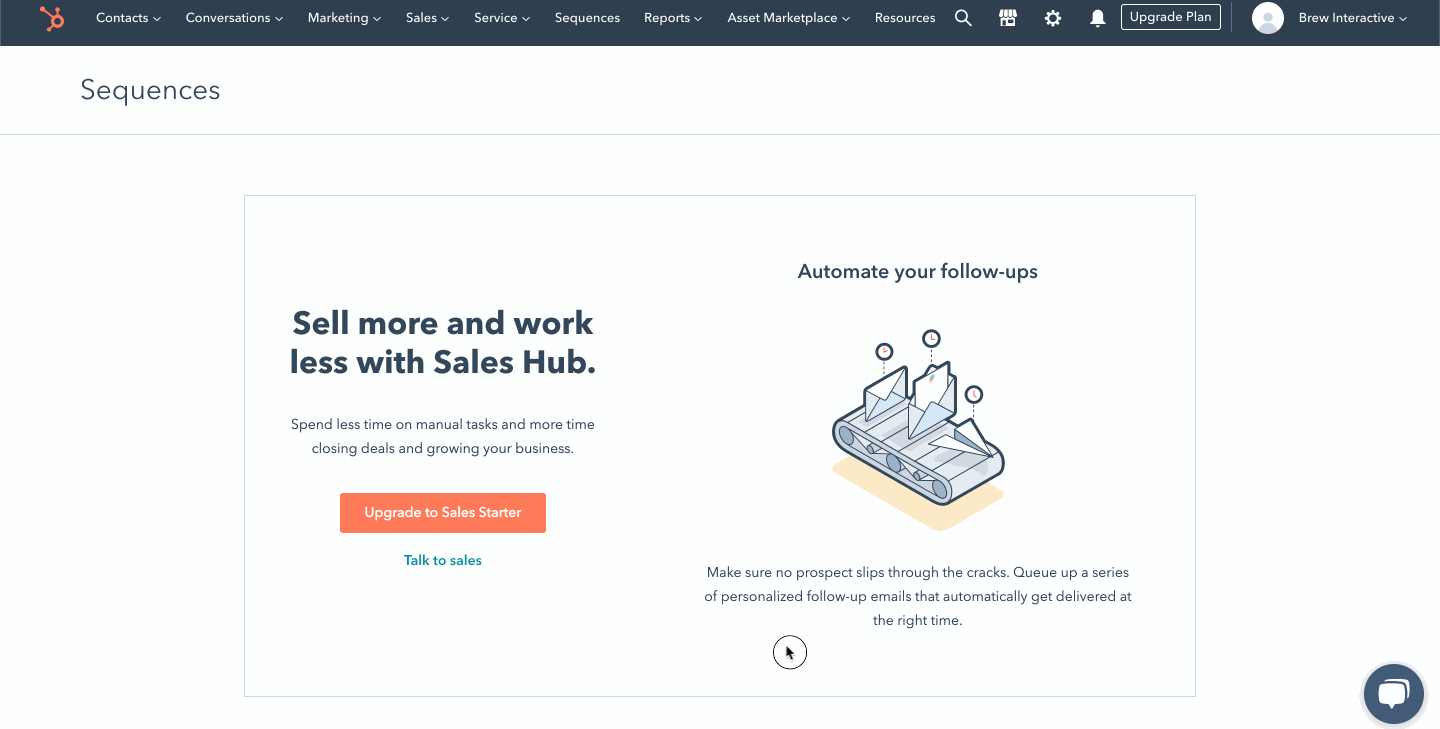
Tip #18 - Speed up your tasks with sequences
Leads are not generated overnight; the best ones require you to spend time nurturing them. With HubSpot’s sequences tool, you can do so easily by creating a series of email templates that are targeted and timed. Once the contact replies to your email, they will be removed from the sequence, and stop receiving emails. This helps you maintain constant communication without losing track.
To create a sequence, click on ‘Sequences’, then select ‘Create Sequence’, and add an email template or task.
Tip #19 - Adjust your contact records to display only the data you want to see

In HubSpot, you can establish your activity feed so that only the information on contacts that you are most likely to be interested in will be displayed. Having a clear idea of the fields that are most important to you will help you in configuring your contact records so that they will be the first to appear.
You can review contacts by customizing your requisites in the contact properties fields such as First Name, Last Name, Email, Phone Number, and Lifecycle Stage. If you find the predisposed fields too limited, you can also choose to select the custom properties function for further adjustment.
Tip #20 - Upload smaller images and videos
The amount of time your website takes to load is essential; not only will it affect visitors’ experience, but also your rankings on Google. One of the most significant issues that causes a site to slow down is large files, including videos, images, and PDFs. When you upload images or videos into HubSpot, remember to reduce the file size as much as possible without compromising on quality.
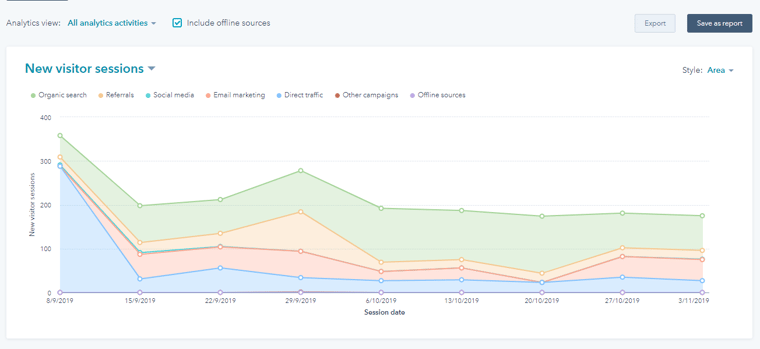
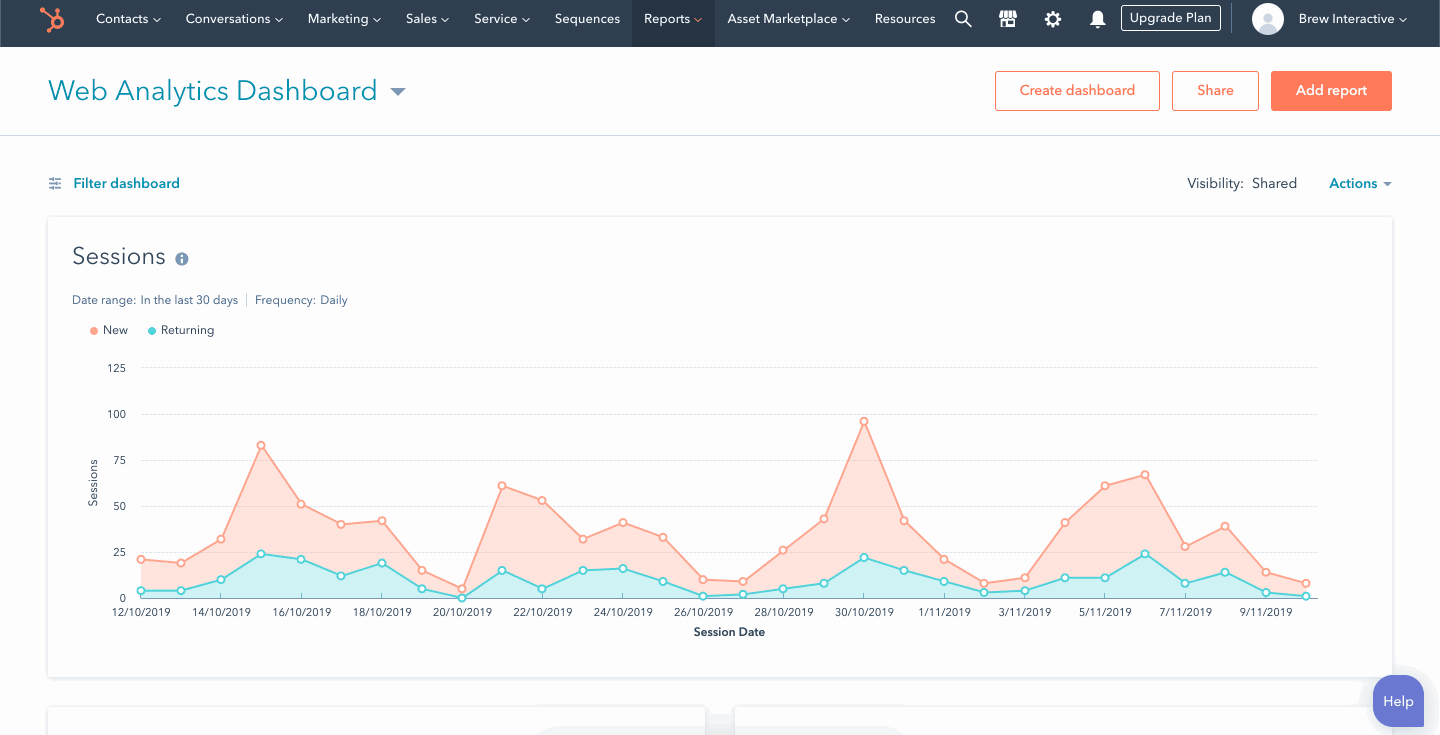
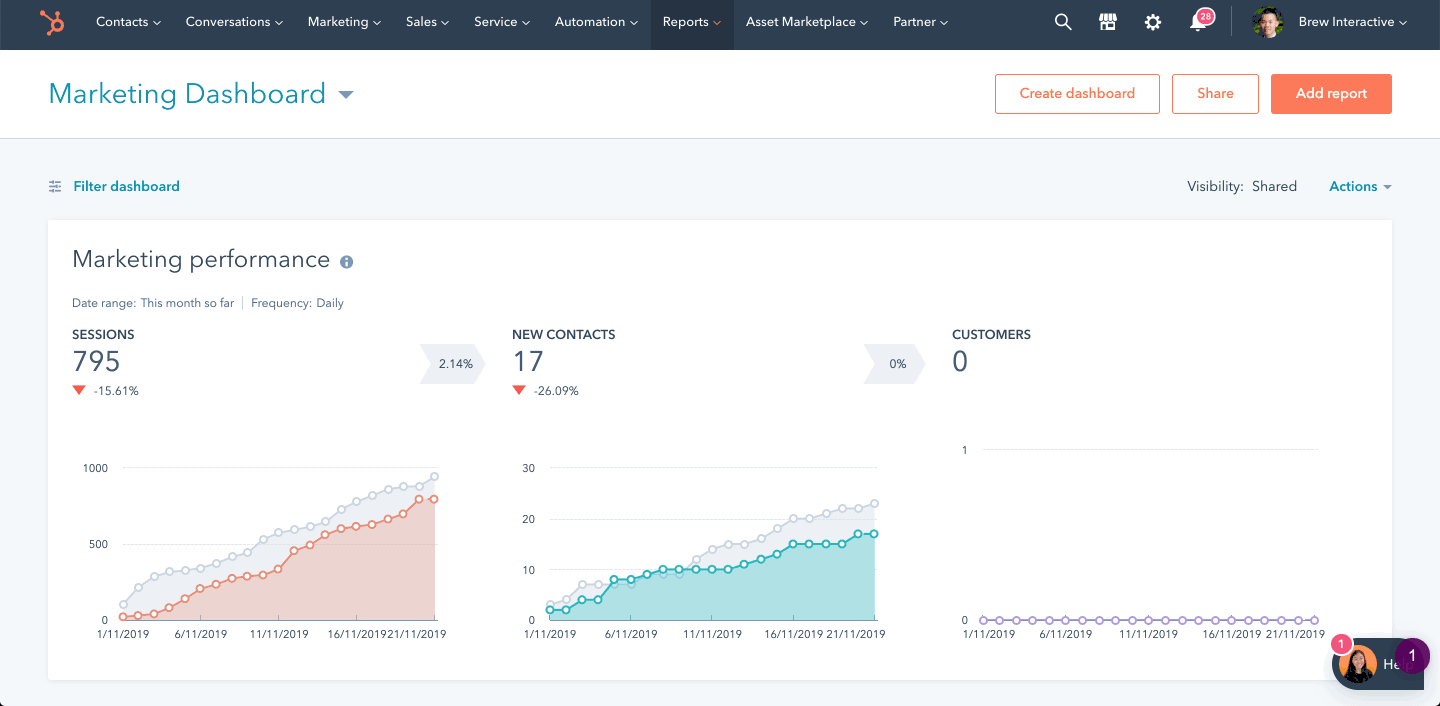
Tip #21 - Filter your dashboard
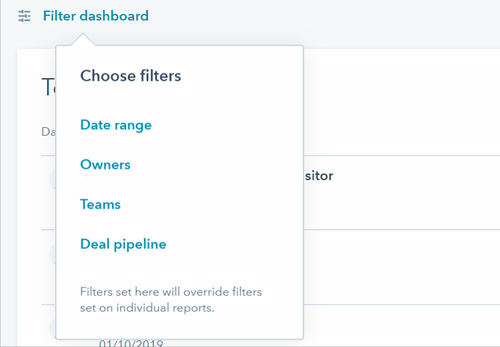
The most important part of marketing is obtaining information that we can use to track results and the ROI of our campaigns, and with the ‘Filter Dashboard’ function, you can adjust the date range and frequency displayed. Doing so allows you to assess the effectiveness of increasing qualified traffic and new contacts over a specific period, and the filter can be applied to the entire dashboard for a proper comparison of all analytics.
Tip #22 - Use HubSpot’s ready made templates
If you need a landing page in a short amount of time, or you’re simply looking for inspiration, try HubSpot’s pre-made landing pages. To check out all the templates available, click on the marketplace icon and select ‘Asset Marketplace’.
You can select a landing page you like and customize it to suit your needs, such as adding CTAs and changing the design. Using a ready-made template will give you the flexibility of designing it the way you envision it, while reducing the time and effort needed to publish the page.
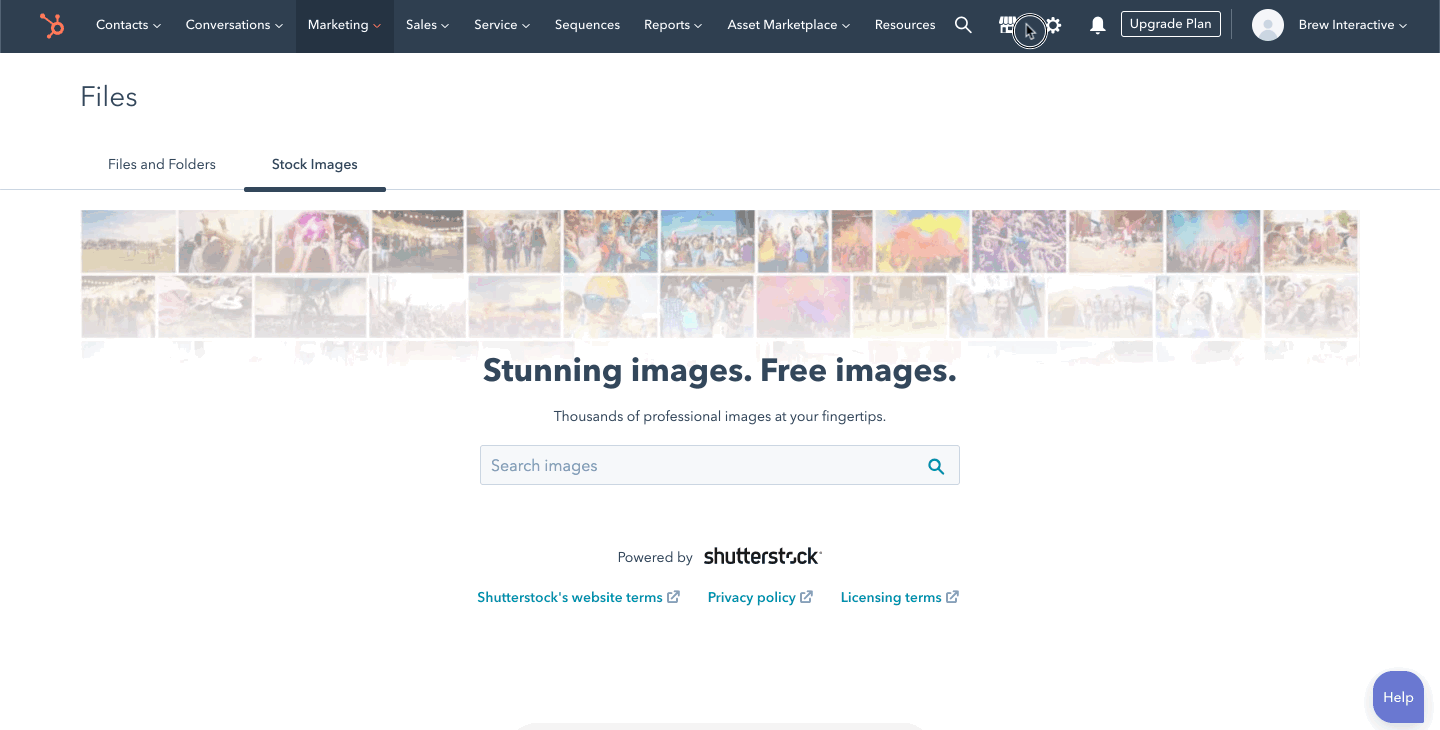
Tip #23 - Integrate Shutterstock into HubSpot
High-quality images go a long way in contributing to user experience. Instead of scrolling through dozens of sites for the perfect image, try Shutterstock, which has been integrated into HubSpot. You can download images and place them directly in your social media posts, blogs or websites, making it less time-consuming.
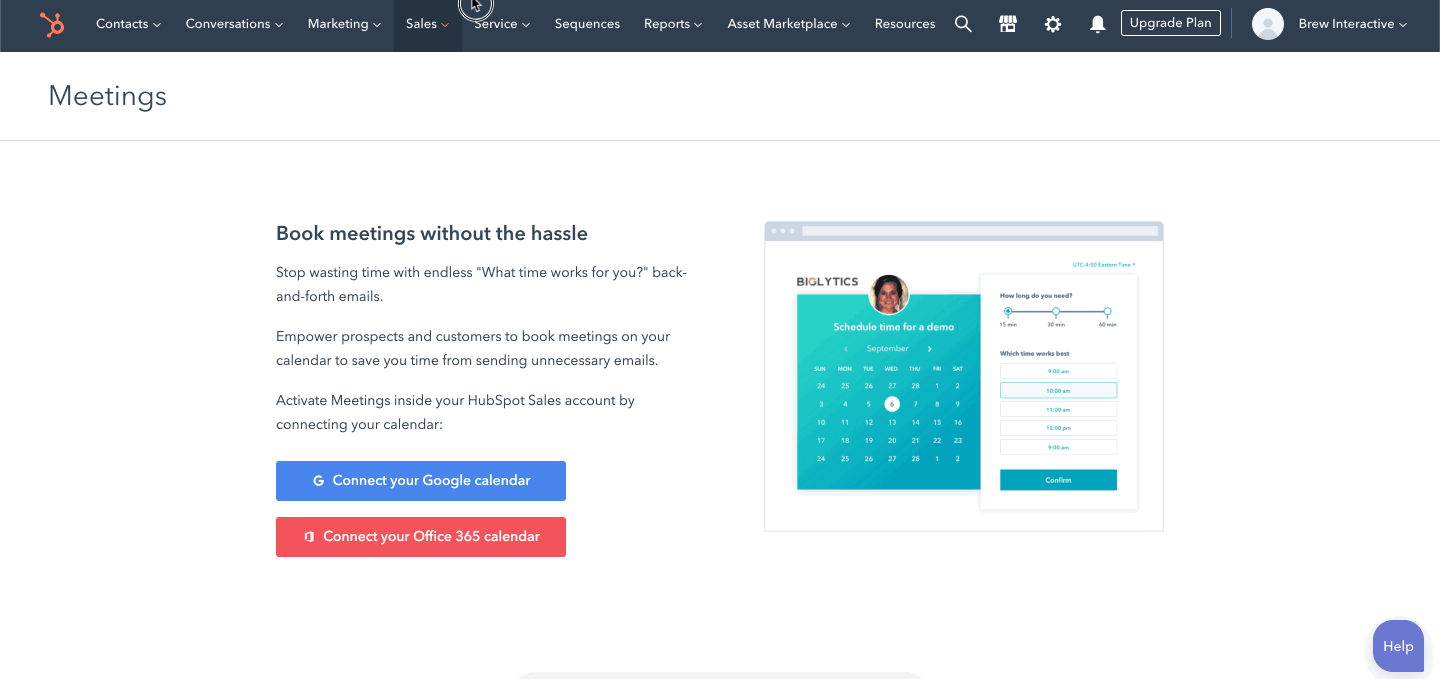
Tip #24 - Activate meeting booking links
Including meeting booking links in your emails to prospects is a convenient method to set up meetings. It is much easier for your clients to schedule a time directly in your calendar instead of having to go and back forth in exchanging messages until you finally settle on a consensus. The meetings are linked with HubSpot, so the data is registered into your CRM.
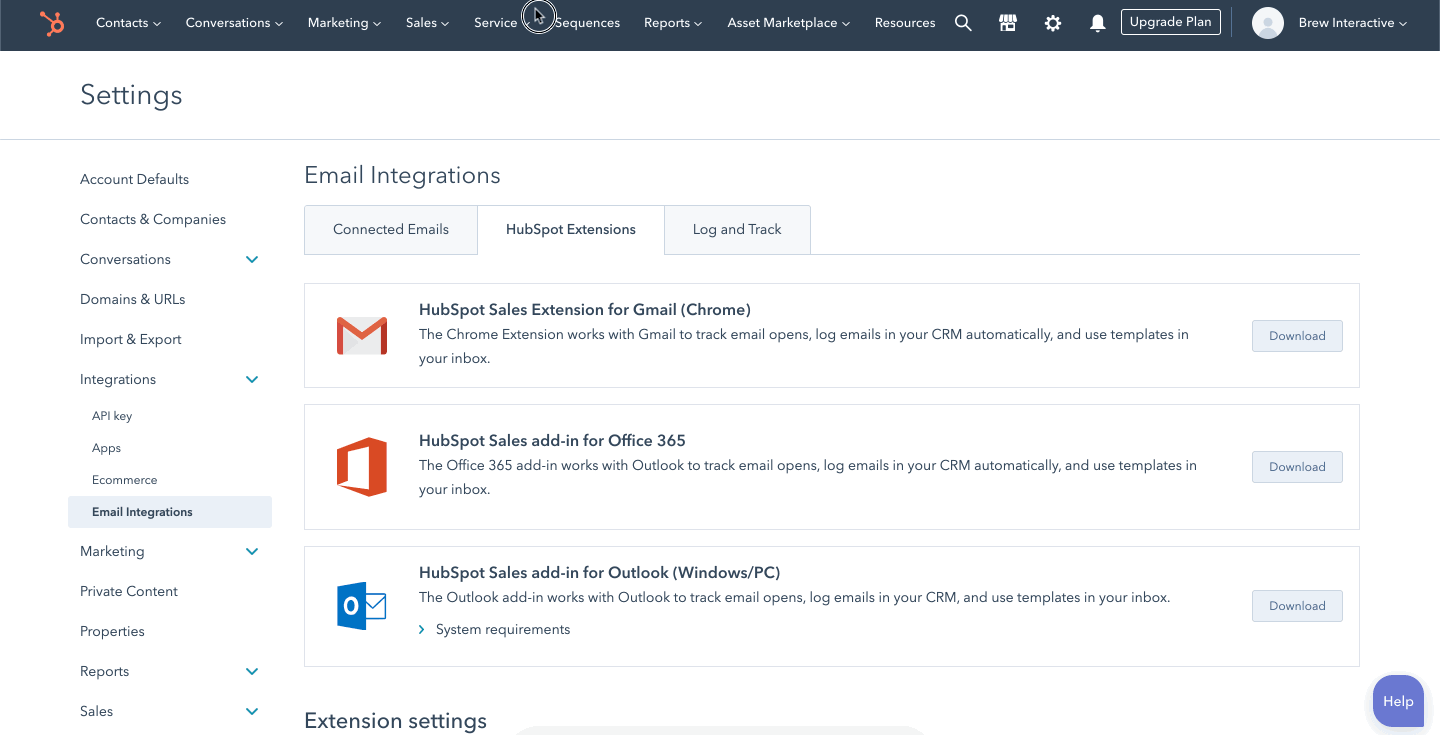
Tip #25 - Integrate your emails with HubSpot
If you have a company email account, you can connect HubSpot to your inbox to reach out to your contacts. HubSpot has an extension that you can integrate with your email client, such as Hotmail, Outlook, and Gmail, so don’t miss out on using this tool.
Tip #26 - Access the HubSpot Marketing Library
HubSpot’s incredible content marketing strategy has aided countless businesses in achieving increased leads, contacts, and customers. As a marketing platform, it continually creates new and relevant pieces of downloadable content for their personas.
Being a HubSpot customer grants you the privilege of accessing their content downloads in the Marketing Library. From there, you can narrow your search to include only content you are looking for, or filtering by content genres, lifecycle stage, or content by topic.
This function is incredibly efficient in saving you hours with free stock photos, blog templates, customizable CTAs, planning workbooks, content ideas, how-to guides, and educational webinars. The Marketing Library is your one-stop platform that encompasses plenty of free resources to be utilized!
Tip #27 - Keep the File Manager organized
When you create your website, landing page, or emails, you’ll need to upload dozens of assets onto HubSpot, and sometimes reuse them for a different purpose. To make it easy for you and your team to find content when needed, ensure that your files are organized as much as possible. This can help you save time when you’re looking for a file, and improve your team’s workflow, so they don’t waste time searching. Click on Marketing > Files and Templates > Files to upload.

There are several ways to organize. Firstly, use simple naming conventions that are easily understandable and avoid abbreviations or shorthand that others are unfamiliar with. Also, you can create multiple folders to sort out your assets and name them in a way that’s familiar to your team.
Tip #28 - Save your report format
For users who need to recreate identical reports for weekly or monthly updates, you’d be glad to know that HubSpot allows you to save your report instead of having to go through the entire process of piecing together one for repeated submissions. All you have to do is click on the ‘Save as Report’ button on the top-right corner of your screen.
You can modify the name of your custom report for easier identification in the future, which will then be available under Reports > Reports Home. This way, you can save time by not having to create new reports constantly.
Tip #29 - Scheduling regular email updates
If you’re responsible for sending weekly email updates to your entire team, choosing to schedule these regular email updates based on the reports that you’ve saved would make it a less tedious process. Locate your saved report on the platform by going to Reports > Dashboards, then click on ‘Share’. Add the recipients you would like to include on your mailing list as well as details such as the email subject, a custom message, and the reports you need.
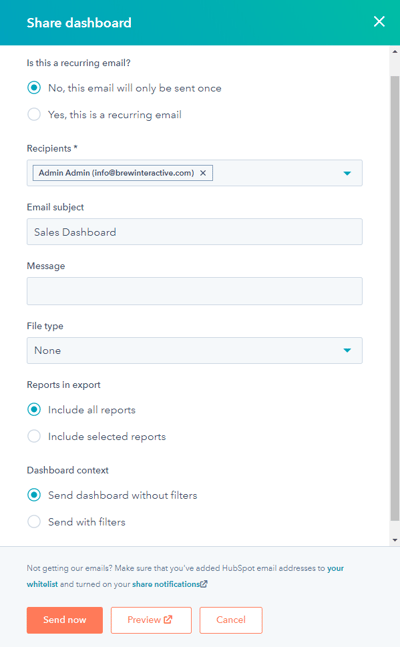
When you select recurring emails, you can further customize the day and time you would like the email to be sent and set it such that the process is automatically repeated. HubSpot will automatically generate a report on that day and send it to your team members. These emails can be received by everyone, including people who are not HubSpot users.
Tip #30 - Use content staging to develop your website
If you find it challenging to visualize how your website will look when you’re designing it, try using HubSpot’s content staging tool for HubSpot CMS users. You can create pages or redesign existing ones before publishing them to your site, where all the page functions will replicate the staged page. After reviewing and doing the final checks, you can replace your existing website with the newly designed in just a click.
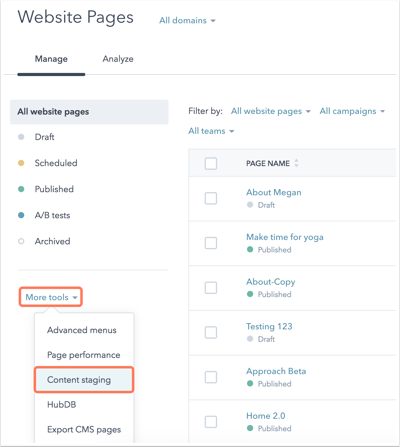
Image from HubSpot
Tip #31 - Reporting Recipes
The most important aspect of marketing is the measure of your marketing performance over time so that you can continually modify your campaign to increase its effectiveness. HubSpot created Reporting Recipes, which are designed to help you do exactly that. It can be accessed easily — all you have to do is navigate to Reports > Reports Home, and select ‘Recipes’ in the left-hand column. There, you get to explore commonly used reports to help you measure performances.
You also get to choose how you want the reporting recipes to be generated, from understanding your contacts database with lifecycle stage distribution reports to one that displays your most converting offers, and more. Customize your report accordingly by selecting ‘Add this recipe’ and voila!
Tip #32 - Cloning
Great ideas and amazing designs should not have any expiry dates on them. HubSpot allows you to save your report format, just as it will enable you to clone an existing piece of content. You can clone just about anything — emails, social posts, workflows, landing pages, site pages, entire campaigns, lists, and more. To access the clone function, go to your HubSpot account and navigate to your block, emails, landing pages, or website pages. In the dashboard, hover over the content and click ‘Clone’.
For blog posts and pages, enter a name for the new blog post or page in the dialog box before clicking ‘Clone. For emails, select the type of email you want to create in the dialog box, and the cloned email will be constructed with the same settings, options, and recipient lists as the original email.
You will then be redirected to the content editor for the new cloned content, which allows you to adjust the material quickly while retaining the original format.
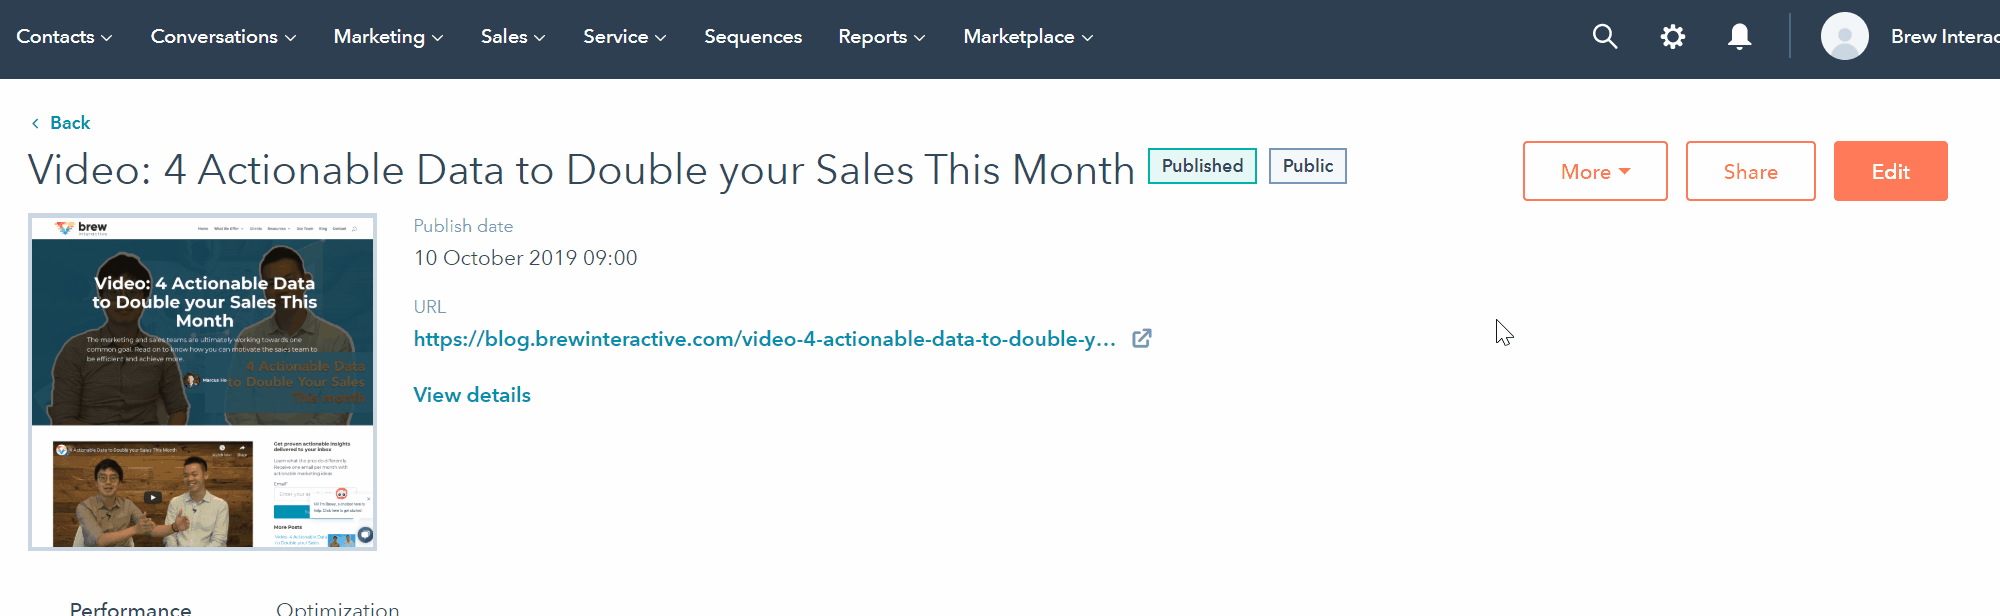
Tip #33 - Embed videos in the emails
With the flood of emails in our inboxes nowadays, it’s hard to get a reader’s attention. It would help if you stood out, and one way to do so is to send a personalized email with an embedded video.
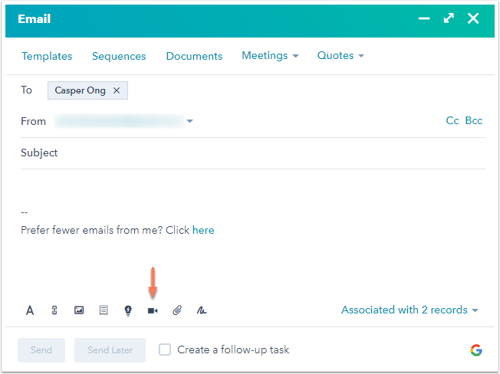
Image from HubSpot
If you have HubSpot Sales or Service Professional/Enterprise, you can send videos in one-to-one emails and sales email templates.
Sending a video not only shows effort but also increases engagement by differentiating yourself from the rest. This is best used when you’re reaching out to prospects whom you’ve researched on, as you’ll be able to deliver content that attracts their interest.
Tip #34 - Use email templates to save time
If you find yourself typing out the same emails again and again, it’s time to stop. In HubSpot, you can convert the emails that you frequently send out into templates, and send them through your inbox. Alternatively, you can use HubSpot’s library of built-in templates, and select one that best suits your needs.
With real-time metrics available, you can see which email templates are effective, and share access with your team so they can benefit as well.
Tip #35 - Use HubSpot to handle your tasks
With so many things to be done, it’s hard to keep track of everything without a to-do list. HubSpot allows you to maintain a list of tasks that you can organize and sort, so you can easily view what needs to be done and leads that require follow-ups. Your team can also see this list, so you can assign them tasks, set reminders, and note down more details.
Tip #36 - Keep an eye on deadlines with HubSpot’s calendar
If you’re doing marketing, chances are, you’ll have multiple blog posts, social media content, and landing pages waiting to be published. It’s good to keep them all in one place so you can pay attention to your content timeline, and have an overview of what’s going to be posted on your website and social media channels. HubSpot has a nifty calendar so you can create tasks and schedule your posts easily.
Tip #37 - Test your emails
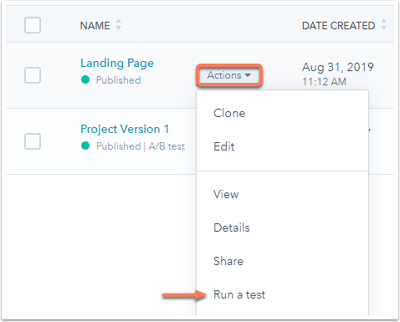
Image from HubSpot
If you’re sending out an email to your audience for the first time, you may not know what will work, or whether it can be improved. This is where A/B testing comes in. You can send part of your target audience two emails with slight changes, and see which version results in the most engagement or conversion, before sending that email to the rest of your database.
Tip #38 - Create contact records as much as possible
Whenever you interact with someone, especially a potential client, try to maintain the habit of creating contact records. You’ll find the information handy when you’re looking to reconnect or follow-up in future, or if you’re looking to close a sale, you can refer to your records as a reminder of who you’ve spoken to in the company.
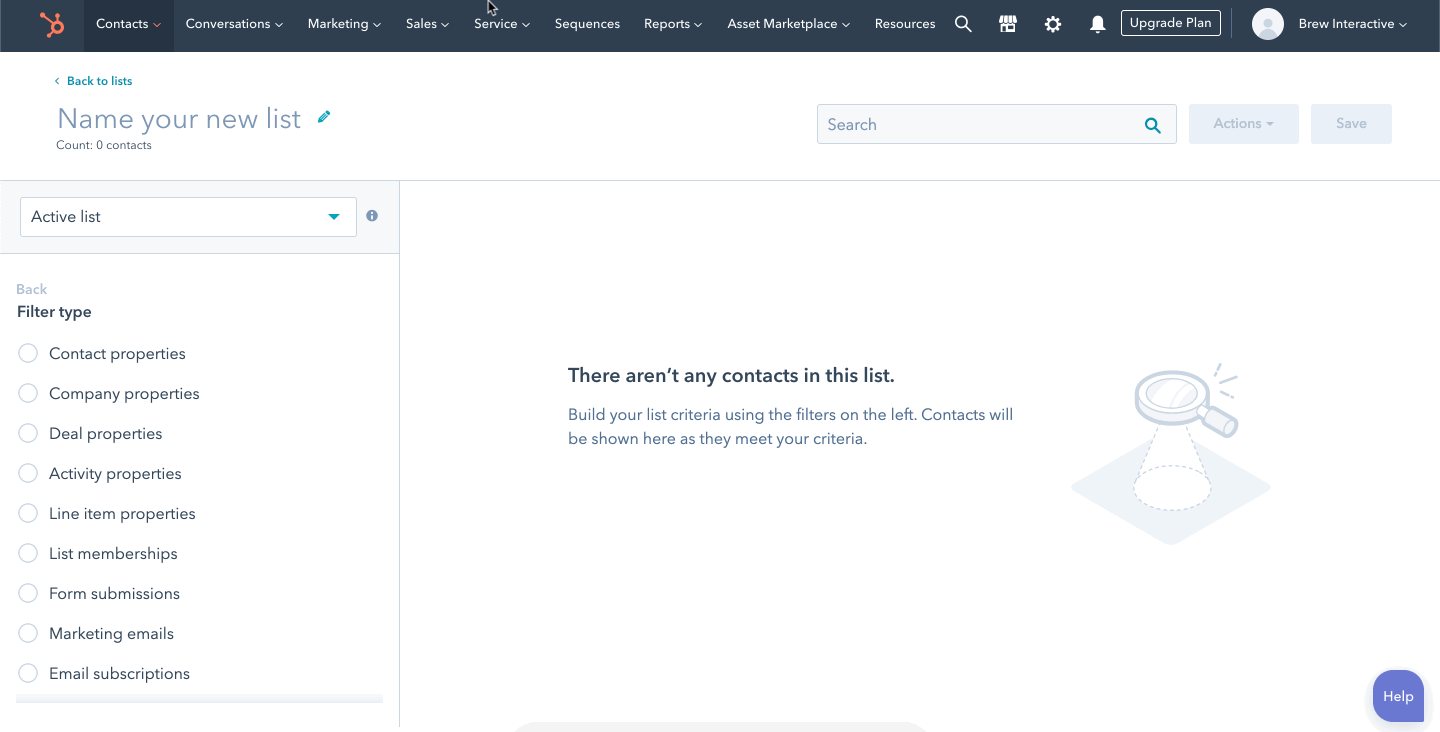
Tip #39 - Create lists of contacts to segment them
In HubSpot, you can create multiple lists to categorize your contacts. Click on Contacts > Lists, then select ‘Create list’, and input a name for the list. You can then choose whether it should be an active or static list, and how you wish to filter your contacts.
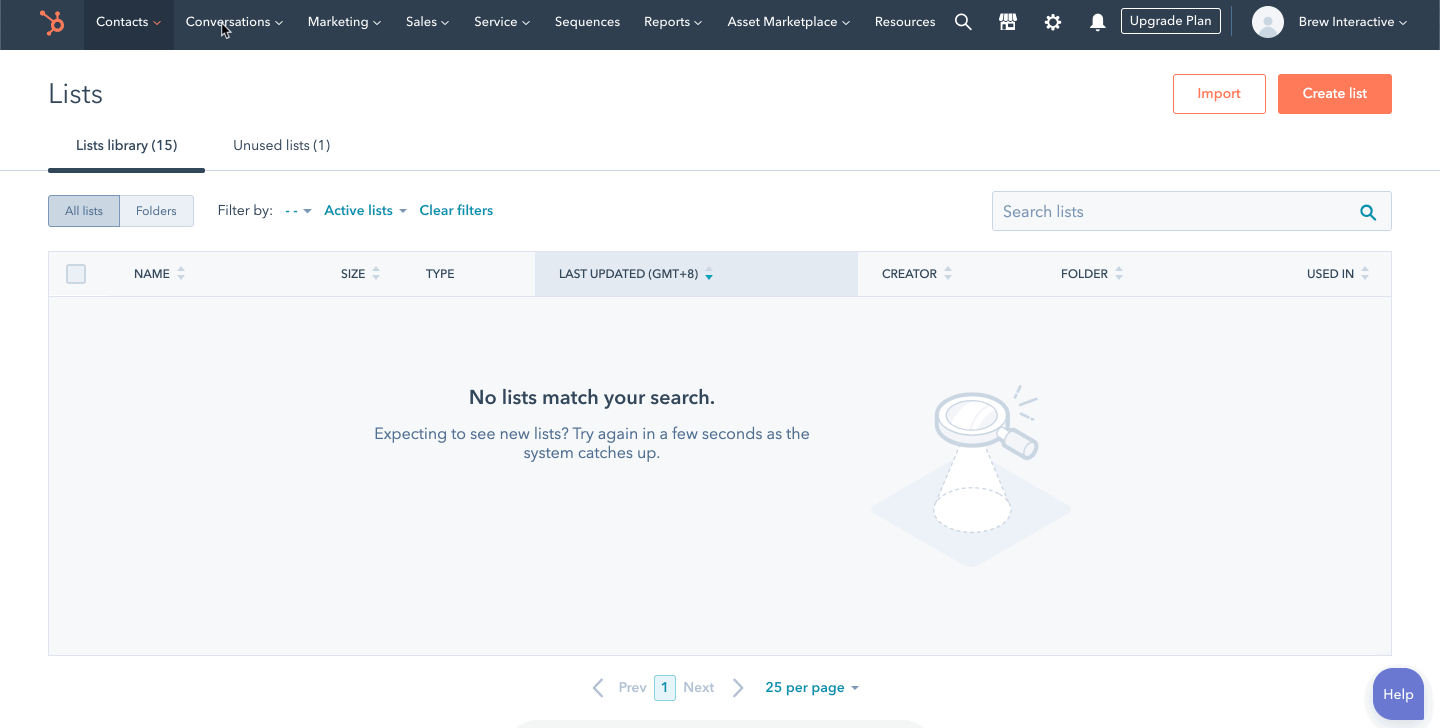
One way to use HubSpot’s lists would be to set them up based on their lifecycle stages, such as the date they became an opportunity, a lead, or a customer. Alternatively, you can sort contacts based on whether they’ve viewed a specific URL or were recent visitors of your site.
Tip #40 - Place and record your calls
Once you have a list of contacts, it’s time to start calling, to turn them into leads and customers. If you’ve done sales calls before, chances are you’ll know the struggle - it’s tough taking notes while trying to keep up a conversation, and once the call ends, you find yourself with notes that are unclear.
This is where HubSpot’s calling and call tracking feature comes in. You can place calls and record them (if your contact has given permission), and the calls will come from your mobile number. Every call will be automatically logged into HubSpot’s CRM, and you can set up a daily calling queue while prioritizing your best contacts.
Tip #41 - Customize your dashboards
Data is beautiful, and should be used to support your marketing activities. From conversion sources to campaign analytics, there are so many ways to use analytics to boost your conversion rates.
Your dashboard is where you view all the analytics and data available, and you can customize them to look exactly the way you want it to be! This applies not just to your standard dashboards, but also to any you’ve created if you’re using the reporting add-on. To begin, click on the icon at the top left corner of your account, and select the dashboard you wish to customize. You can add and edit reports, move and remove, or clone them. If you have a team, the changes you make to the specific dashboard will not be replicated elsewhere, so don’t be afraid to customize!
Tip #42 - Integrate the apps you use
If you’re using multiple tools across different platforms, streamlining them in one place helps increase your efficiency and save time. HubSpot has developed an ecosystem with over 200 tools, and by integrating with the platform, you’ll be spared the hassle of multiple log-ins and pages to get things done. To check out the apps available, click on the marketplace icon and select ‘App Marketplace’.
Tip #43 - Use personas to define your target audience
Instead of casting a wide net hoping to get leads, effective marketing requires knowing your target audience very well, and tailoring your campaigns to suit. To help you with that, HubSpot has a persona tool. Personas are fictional characters that have a general set of traits (such as behavior patterns, needs and goals) similar to your customers. With personas, you can easily identify these groups, categorize your contacts, and target them effectively. To begin creating a persona, click on the settings icon, then select Properties, enter ‘Persona’ in the search field, and select Persona.
Tip #44 - Integrate the Google Search Console
Google Search Console is a free tool that you can incorporate into your website to obtain more data from Google searches. To enable it, click on the marketplace icon and select ‘App Marketplace’. Search for ‘Google Search Console’, click on View Integration, then select Connect to Google Search Console. After you’ve connected, you’ll need to add and verify your domains.
Once the Google Search Console has been integrated into HubSpot, you can view several metrics such as total impressions, average click through rate, and top search queries.